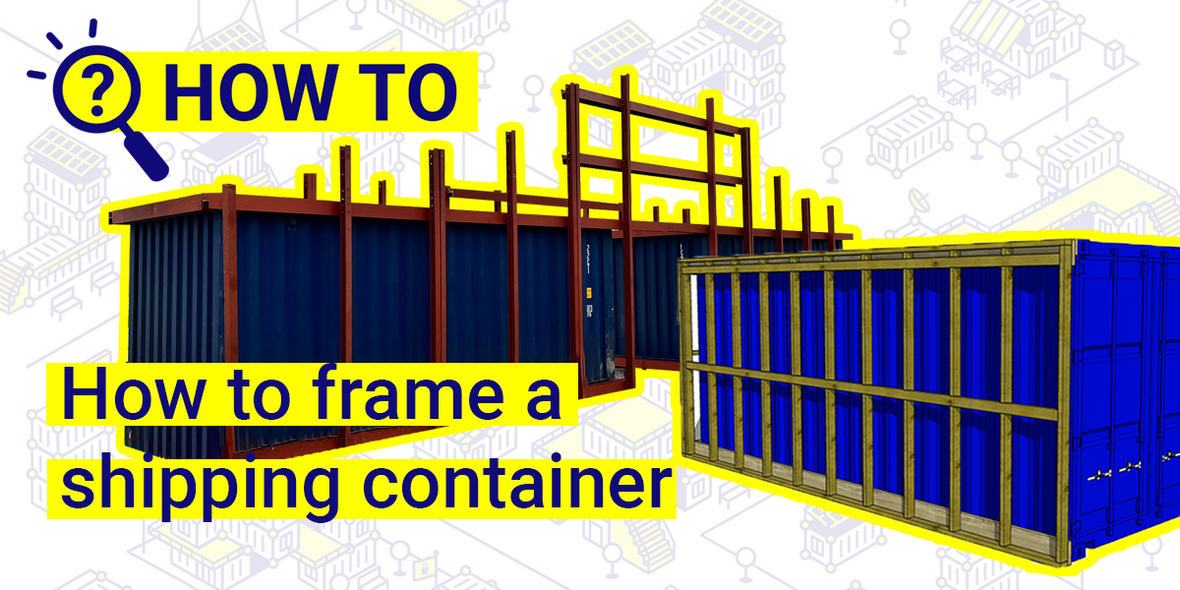
How to Frame a Shipping Container
6 comments
There are very few good attachment points on a shipping container, so if you plan to modify your container substantially on the outside, it may be useful to create a frame over one or more of the exterior walls, or the roof.
In this article we will show you methods for framing the outside of your shipping container - using timber, steel, Unistrut or scaffolding.
Our team at Domino Clamps has compiled these hands-on instructions for you. Plus, you can download our detailed guide for attaching a timber frame.
Why would I need to frame a shipping container?
Whether or not you need to frame your shipping container depends on the intended use and the modifications you are planning.
Shipping containers usually do not need framing for extra structural support. However, if you want to attach things such as shipping container cladding, insulation or a banner, you will need to add an additional structure or subframe to the container to affix these things to.
What are the differences between framing the interior and the exterior of a shipping container
You might want to add framing to the interior of your shipping container if you plan to convert the inside into a living space, hide any wiring or plumbing, cover up the steel walls, add insulation, or install a lot of shelving.
Framing the exterior of the container on the other hand makes it possible to attach cladding, or insulate from the outside while saving you valuable space inside. With an exterior frame, you can also attach signs, banners, a roof, or solar panels to the container.
Interior and exterior frames can provide extra support if you plan to cut extra doors or windows into your container walls.
This guide will look exclusively at methods of framing the outside of your container. Let’s dive into the details.
Choose a material to create your frame
Your frame material is going to depend largely on what you need to attach to it. Timber panels for instance are probably best attached to a timber frame, larger roof structures may need to be supported with steel instead of timber, while Unistrut is very well suited as a frame for mounting solar panels to the roof of a container.
There’s plenty of crossover here in what each one can be used for, and it will also be necessary to consider the cost implications of each one, and the ease with which whoever is carrying out the task is able to work with each material.
For each of these framing materials we offer a convenient way to attach them to a shipping container using Domino Clamps attached to the corner castings, and in some cases with an additional bracket or adapter.
Attach your frame to the shipping container exterior
Some tutorials online will suggest welding angle brackets to the exterior of the container for timber battens to attach to, or even glueing timber battens directly to the walls in order to create this frame and structure. Both of these methods involve messy and damaging processes for the container. We advise against attaching to the walls of the container as these are not structurally sound.
Using a container clamp, like the Domino Clamp, you can create a safe, secure fixing point for your frame which does not damage the container or involve hot processes such as welding. We will explain how to attach and create each one of those frames, which will serve as the base for your framing, roofing, signage and so on.
How to attach a timber frame to a shipping container
Without a doubt the most popular material for framing shipping containers is timber.
We provide four simple ways to attach wood and timber to a shipping container:
-
Bolt the timber to the Domino Clamp using M12 set screws. Refer to the hole spacing diagram in the Domino clamp technical specifications in our downloads page and simply drill 12mm or 13mm holes through your horizontal cross beam timbers and bolt them directly to the Domino Clamps. For most applications it wont be necessary to use all four threads
-
Make use of either our shipping container angle brackets or framing brackets to provide a surface both on the side, and on the top of the container. This method doubles the amount of fixing points for your frame, making it much easier to frame off the top of the container, or even add a roof to the container or a strong surface on which to mount solar panels. You will then bolt the main rectangular structure of your frame to these brackets.
-
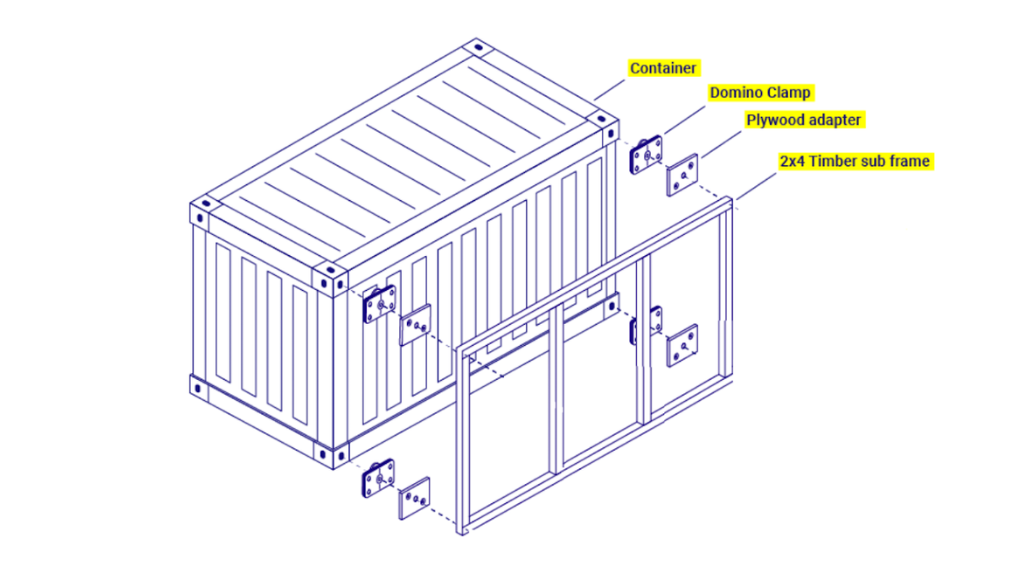
If you prefer to work just with screws for building your frame, we also offer a shipping container plywood adapter which attaches to the container via the Domino Clamp, allowing you to use simple wood screws to screw your timber frame to the 30mm plywood adapter.
- Along the long length of the container, you may want to support the horizontal timbers at the midway point, so that they don’t sag. You can use our roof bracket to do exactly this. One or more of these along each side of the container will keep long timbers held secure to the top side rail of the container. Just select the appropriate length bolt from the dropdown menu for the size timber you are using when you order.
Download the full step-by step instructions for Framing a Container with Timber
How to attach a steel frame to a shipping container
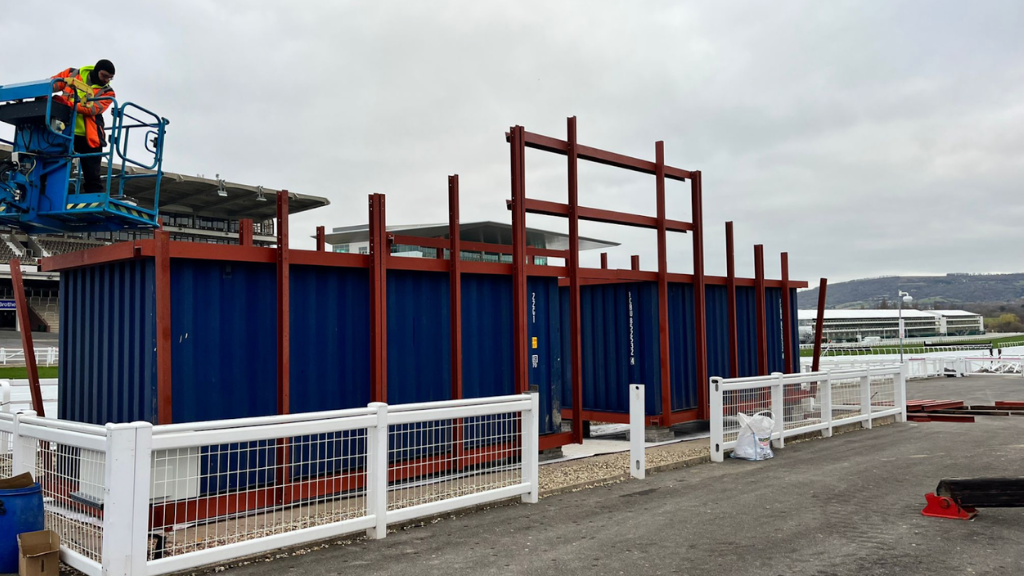
You can also create a sub frame using box section steel. This will be more expensive but will last much longer.
We provide three simple ways to attach your steel frame to the shipping container:
-
Bolt the steel section directly to the Domino Clamps on the container.
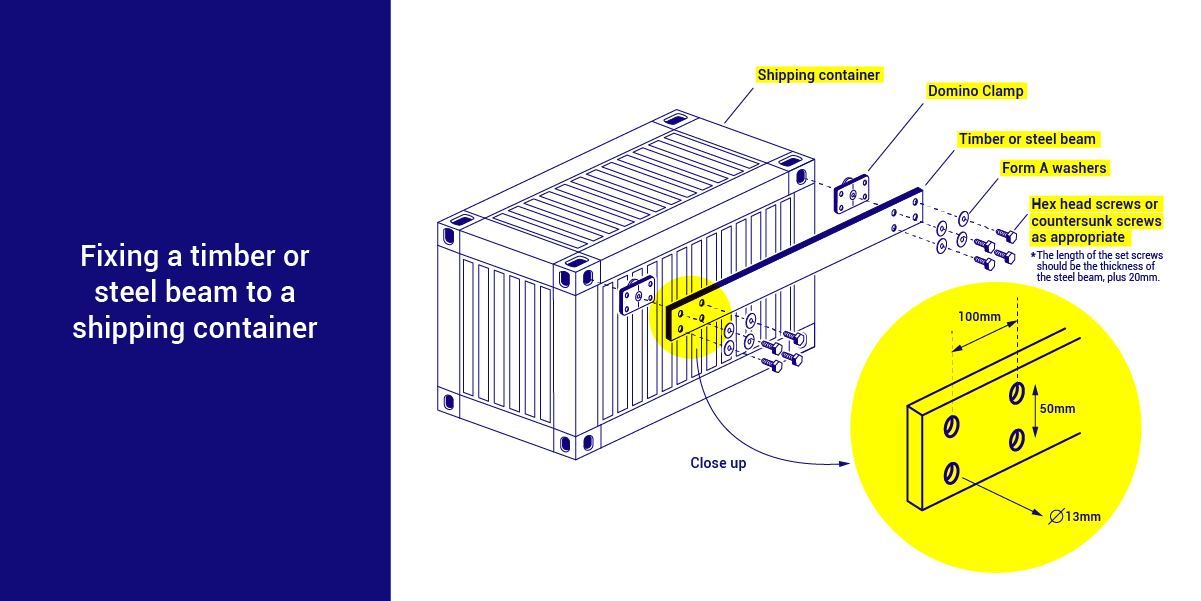 You will need to carefully mark up your steel sections so one end of the steel lines up with the holes on one Domino Clamp, and the holes on the other side line up with the other Domino Clamp. This will need careful measuring and drilling of your steel. Please refer to the hole spacings which are drawn out in the technical documentation of the Domino Clamp.
 -
Make or purchase some steel angle brackets or framing brackets to bolt to the Domino clamp and support your steel frame. You can refer to our guide to making shipping container brackets or buy some premade, pre drilled shipping container angle brackets directly from our shop.
-
A bolt and weld plate adapter for a shipping container offers a large, heavy duty attachment plate which you can either weld or bolt your steel frame onto.
- Along the length of the container, it’s important to support the horizontal steel beams at the midway point to prevent sagging. The roof bracket offers the ideal solution for this. Placing one or more of these brackets along each side of the container ensures that the long steel beams remain securely fastened to the top side rail.
How to attach a Unistrut Frame to a shipping container
Pre-drilled steel channel systems like Unistrut could be used to make a sturdy and relatively lightweight frame, using little more than a metal chop saw and some hand tools.
Unistrut’s P1000T channel has slots in the back which allows you to bolt it directly to the Domino Clamp, and come up with whatever design of subframe you might need for your needs using their wide variety of joiners and accessories.
We have Unistrut starter kits available in our webshop which can also be very effectively paired with our angle brackets if you want to create a Unistrut frame on the roof of a container, like in the 3D render below, taken from our case study When some student from the University of Liverpool built a frame for a solar powered refrigeration unit.
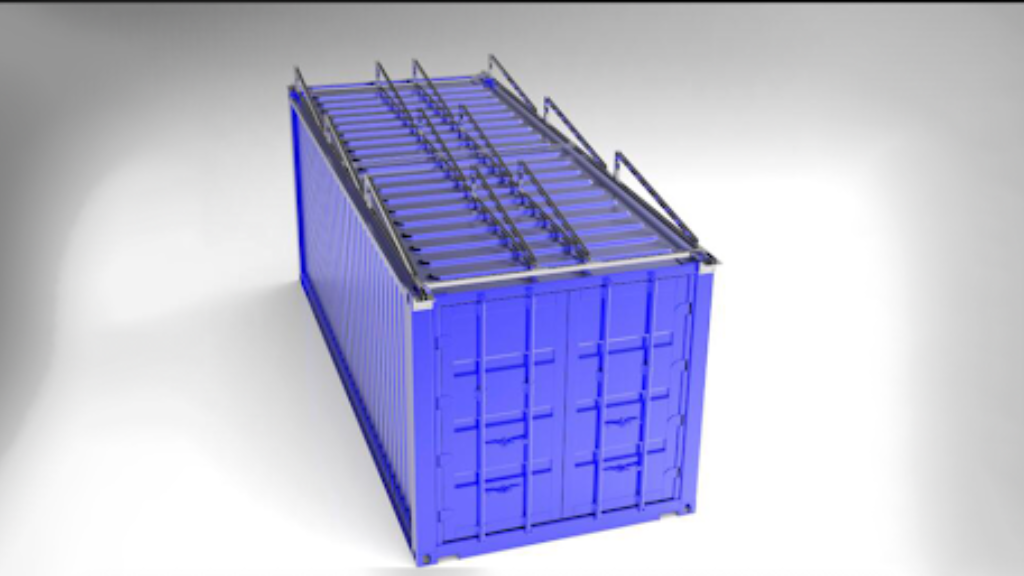
When creating a Unistrut frame on the roof of your container like in the above image, it will be useful to secure it in place in more than just the corners. For this you can use our roof brackets to hold long lengths of Unistrut in place along the top side rail of the roof, removing movement in the long unsupported sections.
How to attach a scaffold frame to shipping container
48mm (1.5” NPS) scaffold tube can be a really useful frame choice, especially when you consider the extensive options for attaching steel scaffold tube to a shipping container offered by our wide range of tube clamps.
Our 20’ shipping Container banner kit contains everything you need to frame off the long side of your 20’ container, and our 8’ shipping container banner kit does the same for the door or rear end of the container.
Using scaffold tube as the frame material is especially well suited to mounting banners, since there are no sharp edges to tear the banner, but also for quick to assemble lean-to shelters, carports or even gym equipment.
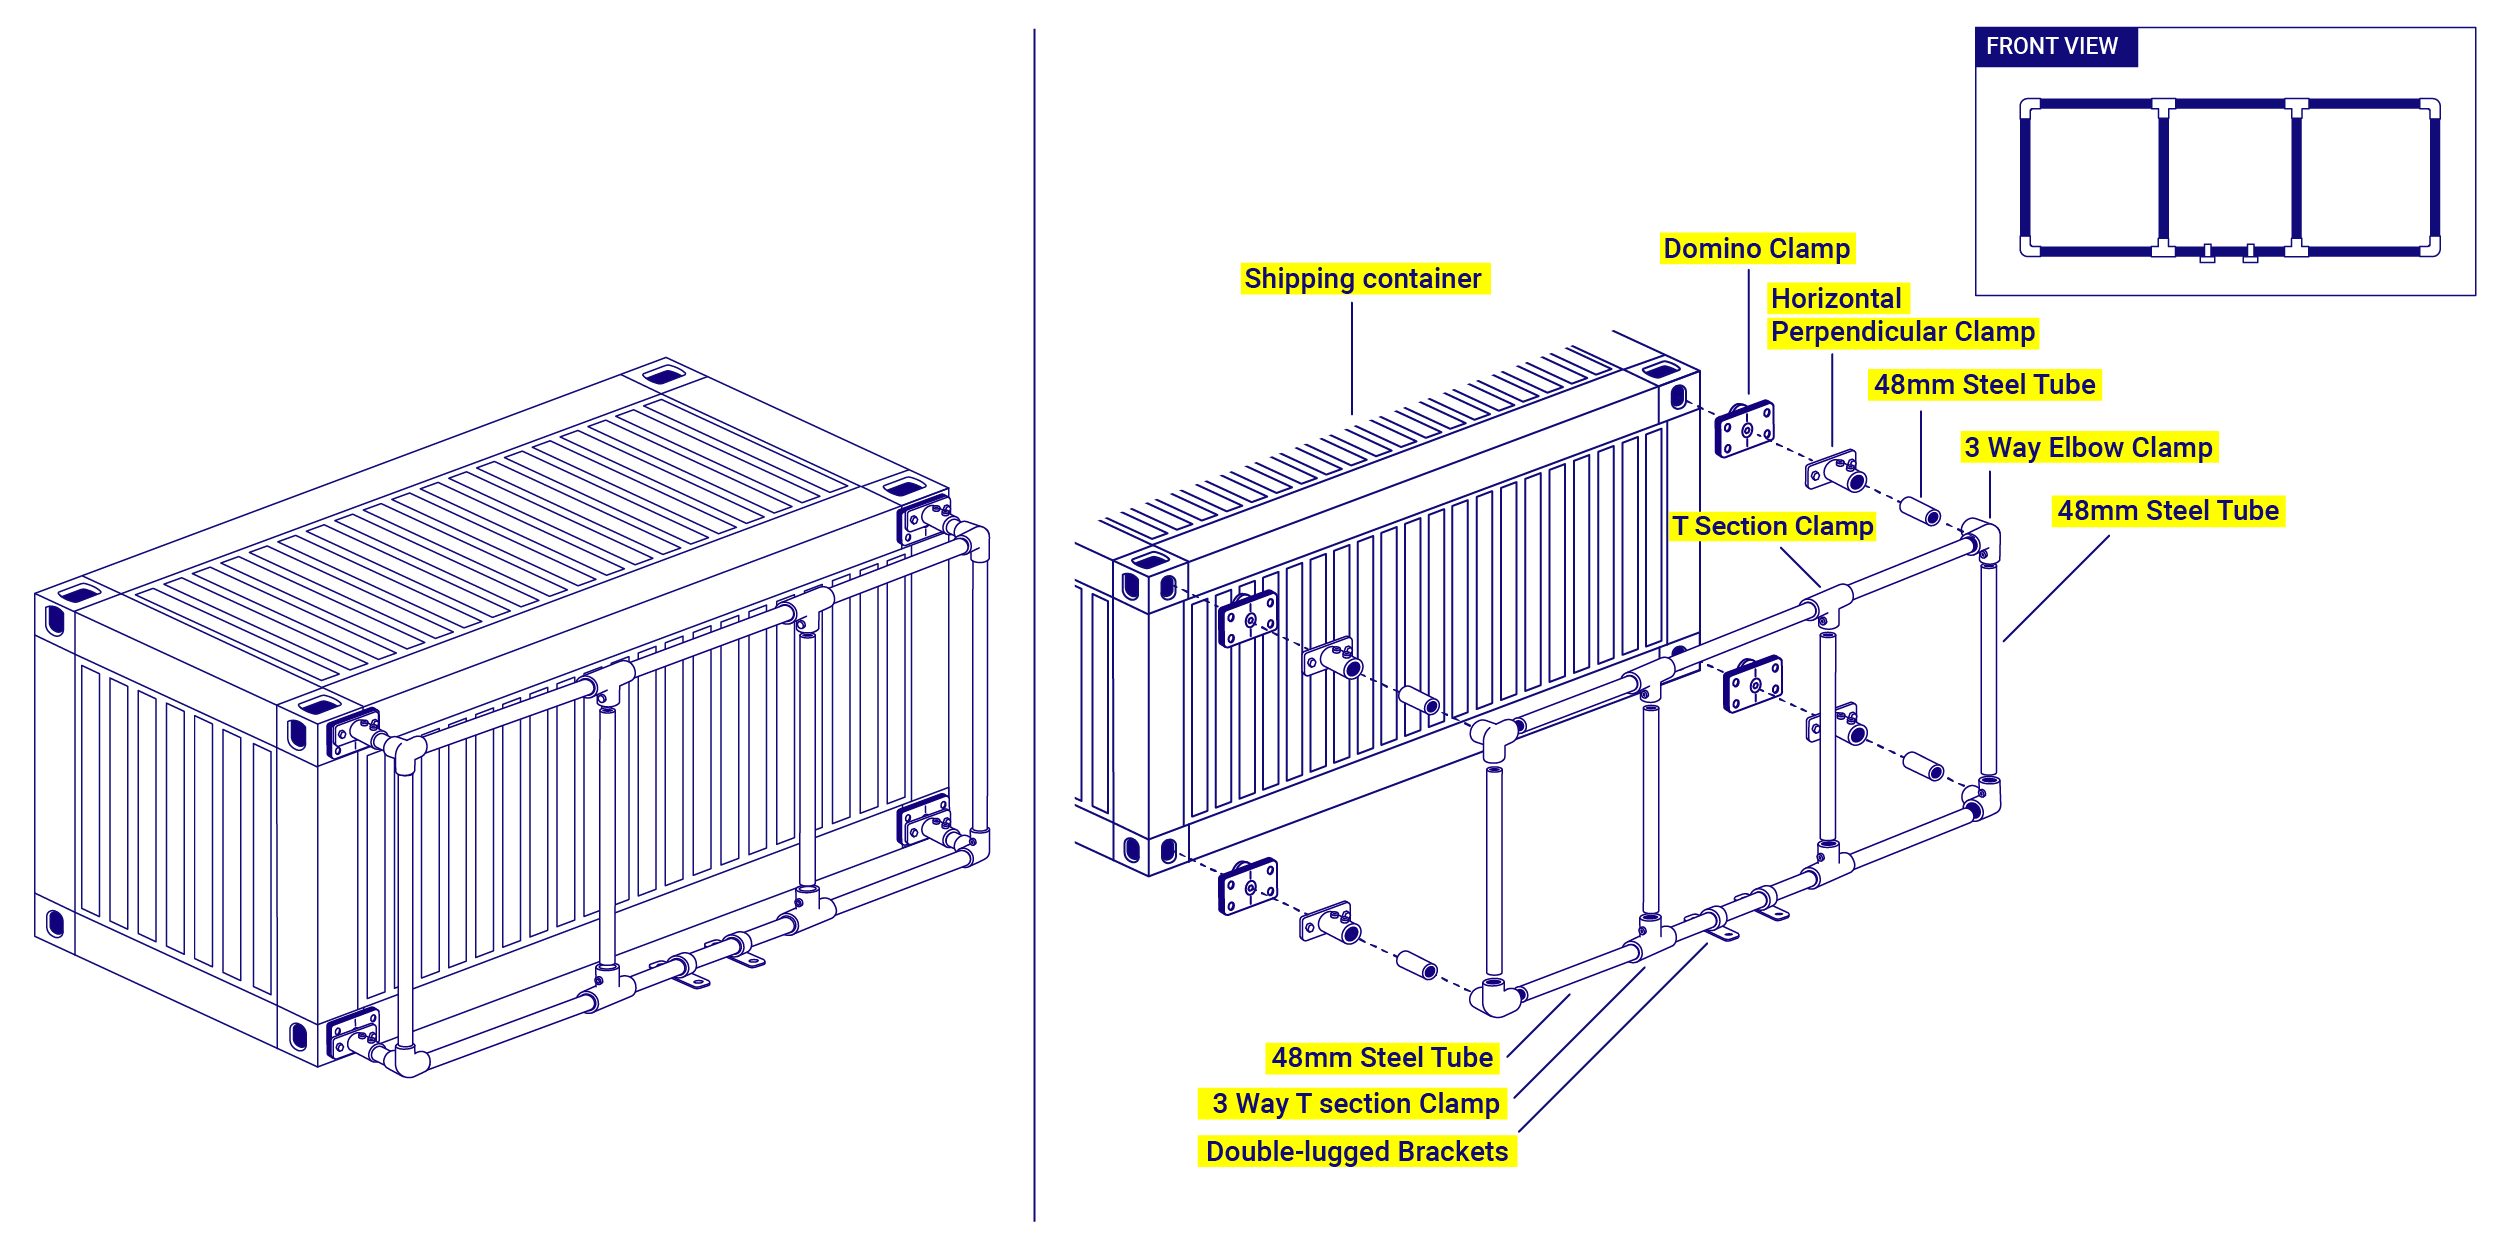
Step-by-step guide for framing a shipping container
The beginning section of our cladding video demonstrates in detail a method of framing three sides of a shipping container using Domino Clamps, which will leave your shipping container completely undamaged.
These instructions are meant for guidance only and depending on the condition of your container and personal preference may need to be adapted to suit your needs.
How do support a frame along the length of a 40’ container
Especially when framing a 40’ container, it is important to find a way to support the horizontal material to prevent them from sagging or bowing in the middle. Our roof brackets attach along the top of the long side of your container, and allow you to bolt your timber or steel section to the pre-threaded holes in the side, eliminating movement in the middle of the long section of material.
They also will support scaffold tubes; bolt one of our horizontal tube clamps to them and keep your long spans of horizontal tube from sagging and moving in the middle of the span.
Conclusion
Knowing how to frame a shipping container is essential for various modification projects. Framing can help with additional structural integrity or give you a good starting point for a lot of different container conversion projects. Whether you frame the interior or exterior is a decision that depends on your specific needs.
If you want to save space on the inside of your container and add insulation to the outside, or convert the outside of your container, framing the exterior will provide a good solution. Different materials such as timber, steel, Unistrut, and scaffold tube, give you a lot of options for your building project.
- Timber framing is popular because it is cheap and easy to install.
- If you are looking for maximum durability and longevity, steel framing is a great option.
- Then we presented Unistrut, which offers a lightweight and sturdy framing solution.
- Lastly, we also think scaffold tube framing can be a good choice if you want to mount banners, shelters, a carport, or gym equipment.
If you are in need of a secure foundation for your framing project, check out our container clamps. These clamps provide a sturdy attachment point for your frame, and there is no need to drill into the steel of the container.
We hope you enjoyed our framing step-by-step instructions!
Further Reads & Links:
- Check out how to use our Roof Bracket for shipping containers to learn how to support a long piece of structural timber during framing.
- Sign up for our newsletter to get updates and new How-To-Guides directly to your inbox.
- Subscribe to our YouTube Channel for useful video instructions and tutorials!




Comments (6)
Hi Jay, we have sent you an email.
Need pricing for 16 units shipped to 90723, Paramount California U.S.
Jean Dupuis – We don’t have a resale location but we frequently ship to Canada.
Thank you for sharing the information.
Do you have a resale location in Canada?
To attach king posts to the inside corners of the containers and then build the roof from there using standard cross beams, purlins etc. We recommend our Framing Brackets https://dominoclamps.com/collections/shipping-container-brackets-and-adapters/products/framing-bracket
Hi Domino clamps – I’m going to build a single pitch roof between 2 20’ containers set about 5m apart. I was thinking of using your Domino clamp system to bolt 4pc king posts to the inside corners of the containers and then build the roof from there using standard cross beams, purlins etc.
My question is can your system accommodate 6” king posts?