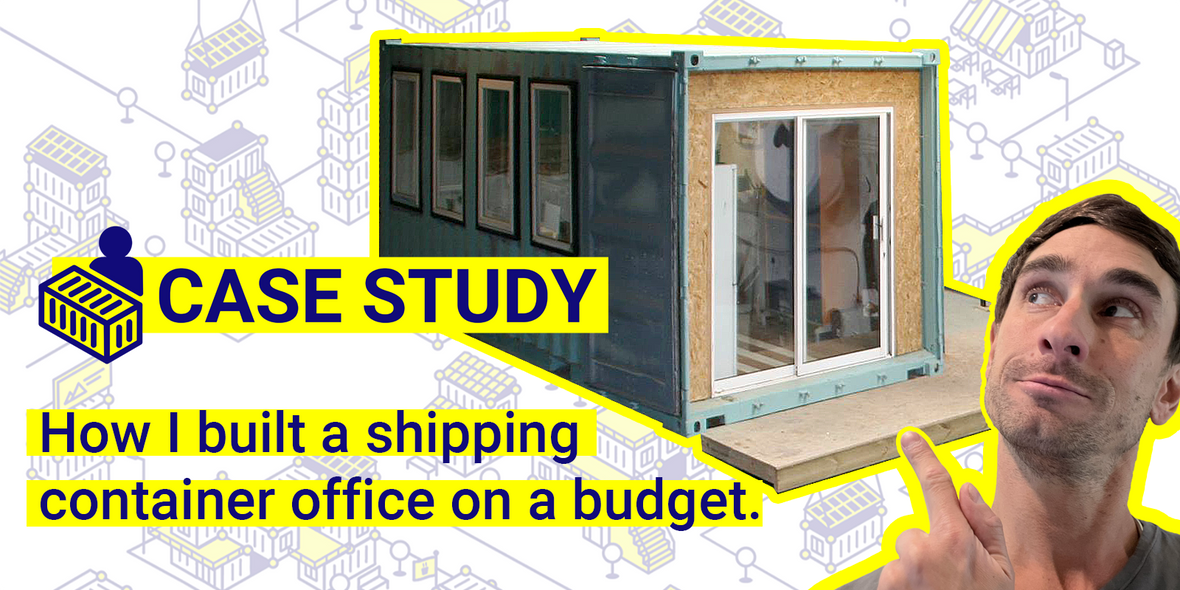
How I built a shipping container office on a budget
By our founder, Justin Beardsell
In 2014, before Domino Clamps had even been born, I used a second hand container to build a shipping container office for my previous company. My company was working from a large open warehouse space for large build projects and needed a space that could be kept warm and clean in which to do office work from year round. Since this was being built side by side with jobs for the company, and also straddled the Christmas and new year break, the process took about 6 to 8 weeks, but it could easily be done in far less time.
I’m going to show you my process, along with tips, things I learned; the mistakes and the successes, so that you can learn from them for your own container office conversion.
Here is the step-by-step on how I built my shipping container office.
Choosing the container

I personally went to a container yard to see what was available and choose the container that would become the office. Try to pick a less miserable day than we did!
I paid about £1150 + VAT for the container. The delivery would have been a further £300 or so but I had access to a truck with a 20ft container flatbed, so we used that to transport it to our warehouse instead.
You can use some of the tips in our guide to converting a shipping container into an office for things to look out for when choosing a container.

We used a forklift to put the 20ft container into position on top of one of our two existing containers.
If you are having a container delivered they should be able to position it for you as part of the service. Make sure the location is ready for them when it arrives.
Preparing the entrance area and choosing the position of the door

We then built a floating mezzanine out from the entrance to the container, and stairs leading up to it. Of course we added handrails round the mezzanine as well for safety.
This also gave us the opportunity to fix the leak that was causing the green stain on the wall!
I decided to not cut any extra openings for the office door but to set a new door just inside the container. I folded back the container doors out of the way, as it was impractical to use them at this height, but I also did not want to devalue the container by cutting them off.
Cutting out openings for the windows

Then we began cutting out holes for the windows. I chose multiple small windows which look great and left wall space for mounting computer monitors against the wall, which is what I wanted. Although this massively increased the work involved, this was made up for by the fact I had reclaimed the windows for free.
What nobody prepares you for when cutting holes out of the walls, is how much the wall moves when cuts are made. Expect sudden, sometimes loud movements in the corrugated steel as they readjust their position as sections of wall are removed.
Creating steel frames for the windows

When installing windows, they need to sit within steel frames. We made ours from 80x40mm box section welded together with an internal aperture big enough for our windows.
Welding the windows into the openings

Then we welded the windows into the openings we had made in the container. This was a reasonably long process and wouldn’t be easy for a beginner welder, due to how thin the corrugated steel is compared to the box section. I'd recommend getting an experienced welder to help with this.

With all 6 window frames welded in place, the container was beginning to feel more like it could be an office already.
Framing the interior to attach the wall panels

Timber battens would form the frame inside the container to which we would attach the sheet material for the walls. They all had to be wedged in place as the glue dried. Don't forget to leave yourself an escape route if starting front to back!
Creating a stud wall for the sliding door

Next we created a stud wall just inside the container door to mount the double glazed sliding doors. (again; reclaimed). The sliding doors are well insulated, lockable, let lots of light in and don't take up space inside the container when opening the door. They are one of the best design decisions we made, in my opinion.
Installing the electrical wiring

I had some help installing the ring main, which was powered from a single phase 32a inlet coming in through the floor. We used H07 rubberised cable which is not what is usually used for domestic installation but we had a lot of it already and it is very well protected, insulated and also earthed.

Sealing the window frames

Our bare steel window frames and the new welds were cleaned and primed to protect against rust and create a base layer for the final coat, which was matt black. Any remaining gaps between the frames and the corrugated walls were then filled with a flexible, paintable filler.
These frames are a little problematic when it comes to insulation, as they act like heat sinks between the inside and the outside. I’m still not sure what is the best solution is to solve this, though as you can see in the following step, they represent only a tiny fraction of the overall space, and the container ends up being very well insulated overall, regardless.
Insulating the shipping container

Next I prepared for the insulation process by sealing off the windows with clear polythene. (this is about to get very messy)
The foam expansion works best in a warm environment, so I warmed the interior and walls with a gas powered space heater since it was mid December at the time.

Using a two-part expanding foam insulation kit, I sprayed the insulation onto the walls and ceiling.
Cover EVERYTHING you don't want to have foam stuck to it FOREVER, especially your skin and hair. I still have foam on my respirator and overalls to this day.

Insulating the cavities in the stud wall for the sliding door with rockwool that was leftover from a friend’s loft conversion.
Pulling up the old floor (a step I would now advise to do differently)

Eventually I decided to pull up the floor, having read about potentially dangerous chemicals that might have been spilled in the container, and the pesticides used in the plywood.
I really don’t think that I would do this again. It was incredibly laborious, I got rid of a very good, solid 28mm thick floor made from very high quality plywood, which in all likelihood did not pose a risk. If I did this again, the most I would do here is to seal it in polyurethane varnish.
Installing enough lighting

Now was the time to install the overhead lighting. I left a spare end with an IEC socket on it so there was a spare power outlet in the ceiling. This came in handy later when I realised I needed more lighting for a comfortable work environment.

A new 18mm plywood floor (plywood prices have almost tripled since then).
I used OSB for the walls. I liked the textured finish when painted, it would be hard wearing, and I could screw some small lightweight fittings directly to it without needing to find one of the timber studs.
Adding floor insulation and plywood floor
More reclaimed materials. This time some offcuts of reflective floor insulation, patched together and taped down with aluminium tape, though normal duct tape would probably be fine.
My friend had a shed full of reclaimed Douglas fir floorboards he was getting rid of, so I planed them down and tidied them up. The three stripes is perhaps not a design decision I'd make again but I liked it at the time.

Last but not least: Office furniture

Now the furnishings. I mounted external monitors directly to the walls between the windows and a single long desk. A melamine topped sideboard on the other side was installed for the toaster, kettle, and any other food related bits and pieces.
I chose not to plumb in water. It just wasn’t worth the effort and there was a kitchen nearby anyway.

A view from another angle. We used 2-drawer filing cabinets to support the desk so that there were three of them in total along the windowed wall. The fridge was unnecessarily large, but it was free. For comfort a large fan in one corner for the summer months, a small but good quality audio system with bluetooth connectivity to listen to music, and some art prints and decor from around the workshop which were left over from jobs.
Combining quality and affordability: My experience building a shipping container office
All steps done. This is the finished result of my project from 2014, my self-built shipping container office. To conclude, let's take a look at my main learnings and the final budget.
- The build took a lot longer than I expected, but I still remember it quite fondly as a process. It was great to have a project to work on with my team and other freelancers which we would all use and benefit from. It brought everyone together contributing with ideas for the project and so it really ended up being a team effort.
- I was fortunate in that I already had a full workshop of tools and skilled people around me to help with aspects that I personally wasn’t capable of doing. I fully acknowledge that this would be a much harder task without both of these.
- Although learning by doing can be fun; it can also be extremely frustrating. If in doubt I would say bring someone more knowledgeable for any aspect you feel unable to do confidently alone.
- Future proof your build as much as possible. Run additional cables both for power and data, install more power sockets than you think you need, and leave yourself open to feed new cables into the container at a later date. I chose not to add plumbing to mine, but I wish I had created an access hole for water and drainage and just covered it up, in case I want to add this in the future.
How much did it cost me in the end to build this shipping container office?
The price of the container was £1200 + VAT. I saved a lot by being able to perform much of the work myself or having team members handle certain tasks, as well as by sourcing second-hand materials. This not only made the container office build more sustainable but also allowed me to complete the project on a budget.
The total cost including the container and some materials was about £5000. This project was completed 10 years ago, so today, the price of this conversion would likely be at least twice as much due to inflation and the rise in building material prices. If you're looking to build your own container office on a budget, you can still benefit from the tips and insights I wish I had had at the time!
We gathered a lot of the materials for this quite far in advance. Keep an eye on places like Facebook marketplace, eBay localised to your area and any ‘freecycle’ type groups in your neighbourhood for cheap or free building materials which you need for the project. You’ll be surprised how much you can source for next to nothing, given enough time.
Do you want to build your own shipping container office - no matter if big or small? You might also like to read our comprehensive guide on shipping container office conversions to help you plan your own project.
For more ingenious container solutions, useful information and offers delivered direct to your inbox, sign up to our information email 📨 or subscribe to our YouTube channel 📺