How to hang stage lighting from a shipping container
Shipping containers are everywhere at events these days where they are used for storage, food stalls and sometimes, even as part of the stage itself.
Rather than simply placing lighting precariously on top of the container, attaching it with cable ties, or going to the effort of framing off the whole container with scaffolding or truss, this how-to will show you how to get a long steel pole up, rigged to your container, ready to hang some decorative lighting or festoon.

Why hang stage lighting to a shipping container?
With your stage lighting attached to a shipping container it presents no additional trip hazard or obstruction to pedestrian or vehicular traffic. And because Domino Clamps don't require drilling to the container or damage it in any way, you can easily attach lighting to containers which have been rented in, without having any issues with the container hire company when they get returned.

What you'll need
To mount some stage lights to a shipping container like we have done in our video, you will need:
- Two Domino Clamps
- A 48mm vertical tube clamp set, with one bored all the way through
- A 48mm T section Tube clamp
- An Aluminium Half Coupler
- A long 48mm scaffolding tube
- A short 48mm scaffolding tube
- 10mm hex Key
- 8mm hex key
- A socket set and adjustable spanner
- A Stage Light

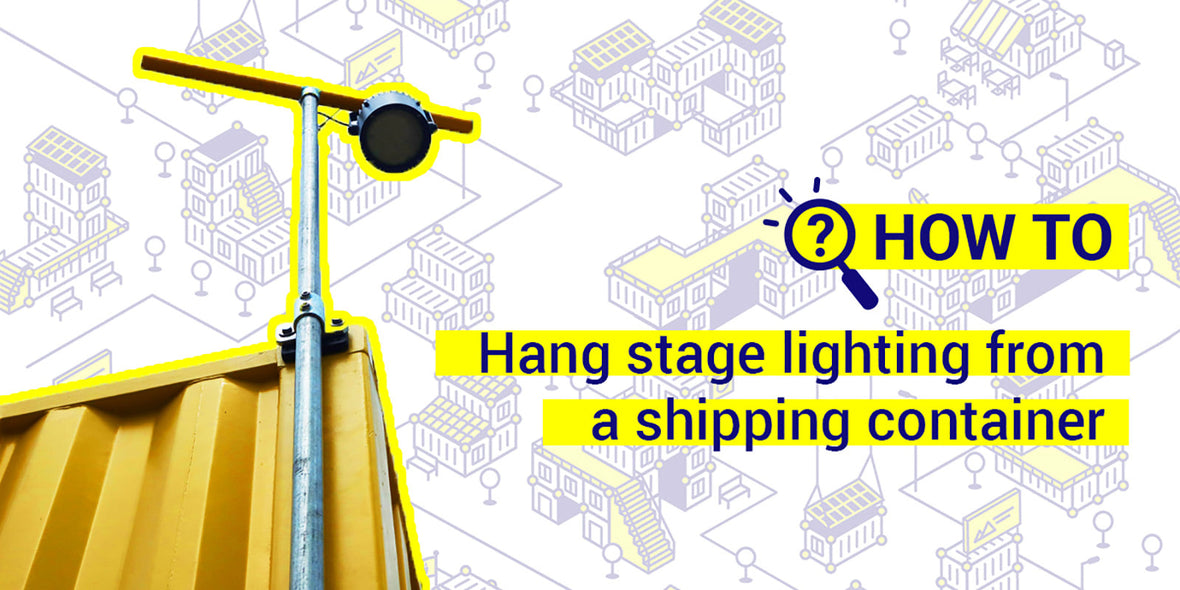
How to put it together
- Start with the Domino Clamps, attach one in the top corner casting, and one in the bottom one. Please check out our detailed video if you're not familiar with installing these.
- Then mount a non bored through tube clamp bolts straight onto the lower domino.
- The bored through version goes at the top. Attach using just one bolt initially, the clamp will dangle at an angle.
- Then feed the long scaffolding tube through the top tube clamp from underneath.
- Now you can fit the T section to the top of the vertical tube, and then fix the light while this is still all at an angle. Continue pushing this tube all the way through the top tube clamp and lower it down into the Bottom one.
- Put the final screw in the top casting and make sure everything else is nice and tight.
For more ingenious container solutions, useful information and offers delivered direct to your inbox, sign up to our information email 📨 or subscribe to our YouTube channel 📺